+86 18531742341
Choosing Ringlock System Scaffolding should begin with the project, not the product catalogue. The correct system must match working height, platform loads, access needs, ground conditions, and local safety requirements. A tower beside a concrete wall needs different planning from a façade system exposed to wind. Small details matter. Base jacks must sit firmly on suitable foundations. Rosettes, ledgers, standards, braces, decks, and guardrails must connect correctly. Every component should be inspected for bending, corrosion, damaged welds, and missing locking parts.
Robin James, chief executive of the National Access and Scaffolding Confederation, has emphasized, “Safety must remain at the heart of every scaffold project.” That principle applies directly to Ringlock System Scaffolding selection. Buyers should verify load capacity, dimensional compatibility, material quality, manufacturer documentation, and installer competence. They should also confirm whether the system supports safe stair access, adjustable bases, toe boards, and edge protection. A low price may look attractive. It may hide weak traceability or poor fit.
Experienced contractors usually review drawings, site photographs, assembly sequences, and inspection procedures before ordering. They also consider transport, storage, replacement parts, and future reuse. These practical issues can control the real project cost. A perfect checklist does not exist. I would not choose a system from specifications alone, because site conditions often reveal uncomfortable assumptions. This guide explains the selection process clearly, while recognizing that competent engineering review and on-site judgment remain essential.
How to Choose Ringlock System Scaffolding?
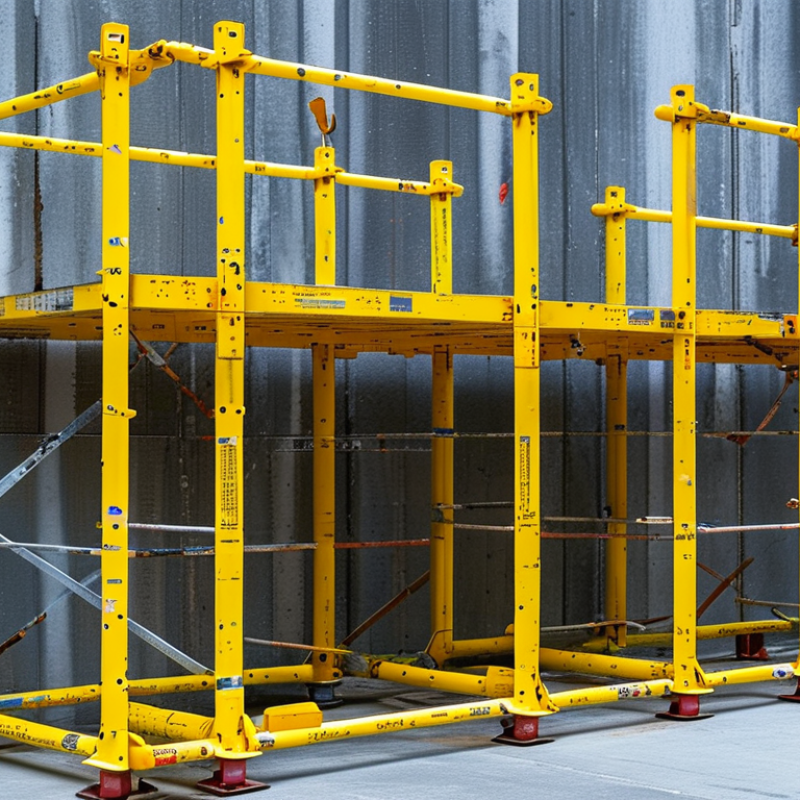
Ringlock scaffolding uses vertical standards with fixed rosettes and horizontal ledgers. These connections create a stable, adaptable working structure. Core components include standards, ledgers, transoms, diagonal braces, base jacks, platforms, guardrails, and toe boards. Each part has a specific load or safety function. A missing brace can affect the whole bay.
Choose the system according to height, platform load, access needs, and ground conditions. Check the standard diameter, wall thickness, rosette spacing, and rated load capacity. Base jacks should provide enough adjustment without excessive extension. On uneven concrete, sole boards can improve load distribution. Timber, steel, or aluminum platforms may suit different handling and durability requirements. Keep components from one compatible system together. Mixing parts casually is risky.
Experienced crews inspect every piece before assembly. Look for bent standards, cracked welds, damaged pins, and heavy corrosion. Confirm that locking wedges seat fully and that platforms rest securely on transoms. I have seen teams focus on speed and overlook small connection problems. That is a costly habit. The installation plan should reflect local regulations, manufacturer instructions, wind exposure, and the actual work activity. A design suitable for light maintenance may fail under stored materials. Recheck the scaffold after relocation, strong weather, or any structural change.
How to Choose Ringlock System Scaffolding?
Assessing Project Requirements and Site Conditions
Choosing ringlock system scaffolding begins with the worksite, not the catalog. Measure the working height, platform levels, access routes, and required loading capacity. Consider whether workers need stair towers, material hoists, edge protection, or temporary roof support. Each feature affects the scaffold layout and base reactions.
Inspect the ground carefully. Soft soil, sloped surfaces, drainage channels, and underground voids can create serious instability. Use suitable sole boards and adjustable bases only after confirming the ground’s bearing capacity. Check nearby walls, power lines, traffic paths, and moving equipment. Wind exposure matters, especially on open sites or tall façades. A qualified scaffold professional should verify ties, bracing, platform loads, and spacing against applicable local requirements.
A neat plan can still fail. Recheck measurements after excavation, weather changes, or design revisions. Site teams often discover that storage areas block access. That small issue can force unsafe workarounds.
Tips: Walk the site with the installer before ordering materials. Photograph weak ground, overhead obstacles, and narrow passages. Mark exclusion zones clearly. Keep a written inspection record after severe weather and whenever the scaffold changes. Do not rely on appearance alone; level, plumb, connection security, and foundation support require physical checks. Safety assumptions are easy to make, and sometimes wrong.
Platform load class is a key starting point when selecting a ringlock scaffold. The values below are the uniformly distributed load classes specified in EN 12811-1 and should be matched to workers, materials, tools, and temporary storage expected on the platform.
Before final selection, confirm the required load class with a competent engineer and verify scaffold height, bay dimensions, access needs, ground bearing capacity, wind exposure, façade ties, guardrails, and local regulations. The load class alone does not determine overall scaffold capacity or stability.
How to Choose Ringlock System Scaffolding?
Material selection affects corrosion resistance, handling, and service life. Galvanized steel is common because it tolerates repeated assembly and outdoor exposure. Aluminum is lighter, but it may require different design checks and connection details. A thick tube is not automatically safer. Inspect welds, rosettes, pins, and base plates for distortion, cracks, or heavy rust before use.
Size must match the work, not only the storage area. Check bay length, platform width, lift height, and access space around the structure. Longer bays can improve productivity, yet they may increase deflection and bracing demands. Small components are easier to move. They can also create more joints and more opportunities for incorrect assembly. Marking every lift helps crews identify missing ledgers quickly.
Load capacity needs a written calculation. Consider workers, tools, stored materials, wind, and uneven loading. A platform rated for light access work may fail as a material-loading deck. Select the correct duty class under the project’s governing standard, such as EN 12811, while local regulations may impose additional requirements. Confirm base conditions, tie patterns, guardrails, and inspection intervals with a qualified scaffold engineer. One practical weakness is relying on a supplier table without checking the actual configuration. Standards, dimensions, and load assumptions must agree. Before handover, measure settlement and verify that every locking device is fully engaged.
| Selection Dimension | Common Option or Range | Typical Technical Data | Advantages | Limitations and Checks | Recommended Application |
|---|---|---|---|---|---|
| Vertical Standards | Steel standards with welded rosettes | Common lengths: 0.5 m, 1.0 m, 1.5 m, 2.0 m, 2.5 m and 3.0 m. Rosette intervals are commonly 0.5 m. | Fast height adjustment, positive connection points and good load-transfer capability when correctly assembled. | Check wall thickness, outside diameter, rosette weld quality, straightness and the rated capacity of the complete system. | General construction access, façade work, shoring and industrial maintenance. |
| Horizontal Ledgers | Steel ledgers with wedge-head connectors | Common bay lengths: approximately 0.73 m, 1.09 m, 1.40 m, 1.57 m, 2.07 m, 2.57 m and 3.07 m. Actual lengths vary by system. | Creates the working bays, ties standards together and contributes to the scaffold’s stability. | Do not mix ledger lengths or connector geometries from incompatible systems. Confirm the nominal bay dimension before ordering boards. | Select bay length according to platform width, access requirements and the loads expected on each bay. |
| Material Grade | Structural carbon steel | Common scaffold steel grades include grades comparable to S235 or S355 under EN designations, subject to the supplier’s certificate and applicable standard. | Provides predictable strength, stiffness and weldability for most scaffold applications. | Steel grade alone does not determine scaffold capacity. Tube geometry, connection strength, buckling length, bracing and foundation conditions are also critical. | Choose a documented structural grade with traceability and test certificates for permanent or heavily loaded works. |
| Surface Protection | Hot-dip galvanized steel | A zinc coating is applied after fabrication. Coating thickness depends on steel chemistry, surface condition and the galvanizing process. | Improves resistance to atmospheric corrosion and generally provides longer service life than unprotected painted steel. | Inspect cut edges, weld zones, damaged areas and white rust. Galvanizing does not eliminate the need for inspection or maintenance. | Outdoor, coastal, humid or repeatedly reused scaffolding. |
| Surface Protection | Painted or powder-coated steel | Protective coating performance depends on preparation, coating system, film thickness and exposure conditions. | Usually lower initial cost and available in high-visibility colors. | Chipped or scratched areas can corrode quickly. Coating quality should be checked after transport and repeated assembly. | Short-term indoor projects or controlled environments with limited exposure to moisture. |
| Tube Diameter and Wall | Scaffold tubes commonly around 48.3 mm outside diameter | A frequently used tube outside diameter is 48.3 mm. Wall thickness varies by system and market; common values may include approximately 3.0 mm or 3.2 mm. | Compatible with many scaffold accessories when the connector system is designed for that tube size. | Small differences in diameter or wall thickness can change connection fit and structural capacity. Use only compatible components. | Verify the manufacturer’s dimensional tolerance, mass per metre and design resistance rather than relying on diameter alone. |
| Working Platform Width | Narrow, standard or wide platform bays | Common platform widths may range from approximately 0.73 m to 1.57 m, depending on the number and width of boards or decks. | Wider platforms improve material storage and worker movement, while narrow platforms suit restricted areas. | Platform width must not obstruct access, exceed the permitted load or reduce required clearance from the building and hazards. | Use the narrowest platform that safely meets access and work-space needs; select wider bays for masonry, façade and material-handling work. |
| Platform Load Class | Light to heavy duty working platforms | EN 12811-1 commonly classifies scaffold working areas from Load Class 1 to 6, with uniformly distributed loads from 0.75 kN/m² to 6.00 kN/m². | Provides a structured way to match platform use with distributed working loads. | Load class is not the same as the allowable load for a single bay or component. Point loads, impact, stored materials and wind may require separate checks. | Use the highest class justified by the work plan, while confirming the complete scaffold design and deck capacity. |
| Typical Load Class Examples | Class 2, Class 3 and Class 4 | Class 2: 1.50 kN/m²; Class 3: 2.00 kN/m²; Class 4: 3.00 kN/m² under EN 12811-1 classifications. | Useful for separating light inspection, general construction and heavier material-handling activities. | These are uniformly distributed working-area loads. They do not replace project-specific calculations for standards, ledgers, anchors, braces or foundations. | Class 2 for light work, Class 3 for common construction work and Class 4 or higher where heavier materials are placed on the platform. |
| Load Transfer and Base Support | Base jacks, base plates and sole boards | Adjustable base jacks are commonly used to level the scaffold. Sole boards distribute reactions to the supporting ground or structure. | Improves level adjustment and reduces the risk of uneven settlement when correctly designed. | Ground bearing capacity, settlement, jack extension, base-plate size and sole-board dimensions must be checked. Never support the scaffold on unstable loose materials. | Essential for uneven ground, soft surfaces, temporary works and structures with significant vertical reactions. |
| Bracing | Diagonal façade, plan and transverse bracing | Bracing layout depends on scaffold height, bay arrangement, wind exposure, ties and the design standard used. | Controls sway, improves stability and helps transfer horizontal forces to the supports and ties. | Adding more ledgers does not replace required bracing. Confirm brace positions, connection capacity and access clearances in the design. | Required for most multi-bay and multi-level scaffolds, especially outdoors and in exposed locations. |
| Anchoring and Ties | Building ties or designed freestanding stability | Wall ties restrain movement and transfer horizontal forces to the supporting structure. Tie spacing must be determined by design and site conditions. | Improves resistance to overturning and excessive movement. | Check the strength of the substrate, anchor type, edge distance, installation quality and wind exposure. Never assume a façade can accept the tie force. | Use designed ties for façade scaffolds; use a verified freestanding configuration only where the complete stability calculation permits it. |
| Connection Standard | Ringlock rosette and wedge-head connection | A typical rosette has multiple connection openings that allow ledgers and braces to be connected at different angles. Exact geometry is system-specific. | Enables rapid erection and flexible bay layouts without relying on numerous loose couplers. | Rosette dimensions, wedge-head shape, pin size and welding details are not universally interchangeable. Test and verify compatibility before combining components. | Choose one complete, compatible system for standards, ledgers, braces, decks, jacks and accessories. |
| European Design Reference | EN 12810 and EN 12811 series | EN 12810 addresses prefabricated façade scaffolds; EN 12811-1 covers performance requirements and general design for temporary works equipment. | Provides recognized terminology for working loads, serviceability, structural resistance and scaffold performance. | Compliance depends on the product, configuration, design calculations, erection method and applicable national requirements—not only on a printed standard number. | Suitable where the project specification or local regulations require European scaffold design references. |
| North American Design Reference | Applicable national and regional scaffold regulations | Projects may be governed by occupational safety regulations and engineering requirements applicable to the job location, including rules for capacity, access, guardrails, planking and ties. | Helps ensure the scaffold is selected and used according to local legal and safety requirements. | Regulatory requirements vary by jurisdiction. A product tested to one regional standard may not automatically satisfy another jurisdiction’s rules. | Always identify the governing authority, project specification and required professional design jurisdiction before procurement. |
| Inspection and Traceability | Component marking, records and pre-use inspection | Maintain records for material certificates, dimensional checks, load calculations, erection inspection, alterations and periodic reinspection. | Improves accountability and helps identify damaged, mixed or unauthorized components. | Remove bent, cracked, excessively corroded or poorly welded parts from service. Do not straighten structural components without an approved procedure. | Required for professional projects, repeated-use systems and any scaffold exposed to heavy loads or severe weather. |
| Final Selection Rule | Complete-system compatibility and engineered capacity | Choose components by verified dimensions, connection tests, design calculations, intended load class, height, bay size, wind exposure and support conditions. | Reduces the risk of incompatibility, overloading, excessive deflection and instability. | Nominal tube size, material grade or advertised maximum load cannot replace a complete scaffold design and competent erection. | Select a documented system that satisfies the project’s governing standards and has been reviewed by a competent scaffold designer or engineer. |

Safety begins with the smallest connection.
Check rosettes, ledgers, pins, base jacks, and guardrails for deformation or incomplete locking. OSHA estimates that scaffold accidents cause about 4,500 injuries and 50 deaths annually in the United States. That figure makes visual inspection more than routine paperwork. It becomes a practical control. A competent person should inspect the scaffold before each work shift, after alteration, and after severe weather. Look for stable foundations, full platforms, toe boards, safe access, and secured braces.
Compatibility affects safety and productivity.
Confirm that standards, ledgers, decks, braces, and accessories share the same system dimensions and load assumptions. Do not mix components because they appear similar. Check the manufacturer’s technical documentation against EN 12810 or EN 12811 requirements, project loads, bay spacing, and working height. The UK Health and Safety Executive repeatedly identifies falls from height as a major cause of construction deaths. A poorly matched component can create movement, uneven loading, or a dangerous gap.
Assembly should feel controlled, not rushed.
Clear locking indicators, manageable component weights, and simple visual checks reduce mistakes at busy sites. Short instructions help. Workers still need training and supervision. A tidy frame can hide a loose wedge. That is easy to miss. In practice, teams may overvalue fast erection and underestimate dismantling risks. Review the sequence, lifting points, access routes, and inspection records before accepting the system for use.
Selecting a Reliable Supplier and Estimating Total Costs
Choosing ringlock system scaffolding starts with the supplier, not the catalogue price. Ask for material certificates, load test records, welding inspection reports, and traceable batch numbers. A dependable supplier should explain steel grade, surface treatment, rosette spacing, ledger capacity, and allowable platform loads. Request recent project references, not polished promises. Speak with a site manager if possible.
Inspect sample parts before placing a large order. The rosette should seat firmly, while wedges should lock without excessive hammering. Check straightness, pin fit, weld consistency, and plank dimensions. Small defects become expensive delays when hundreds of frames arrive. Delivery reliability also matters. Confirm packing methods, replacement procedures, lead times, and technical support in writing. Experience has taught contractors that quick replies before payment mean little without after-sales action.
Estimate total cost beyond purchase price. Include freight, unloading equipment, storage, assembly labor, inspection, maintenance, replacement parts, and eventual resale value. Compare the cost per usable project day, not only the cost per tube. My early estimates were too optimistic because I ignored damaged wedges and idle labor during late deliveries. That mistake changed our purchasing checklist. A simple spreadsheet can test different project lengths, rental rates, transport distances, and loss percentages. Leave room for uncertainty. Real sites rarely follow the neat assumptions used in quotations.